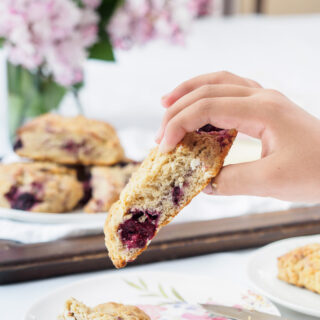
These American style Blackberry Scones spiced with vanilla and just a hint of cinnamon are buttery, tender and flaky. Enjoy them plain, with a dusting of confectioner sugar or drizzled with a simple icing.
If you enjoy scones drizzled with an icing then you'll want to try these Blueberry Lemon Scones as well!
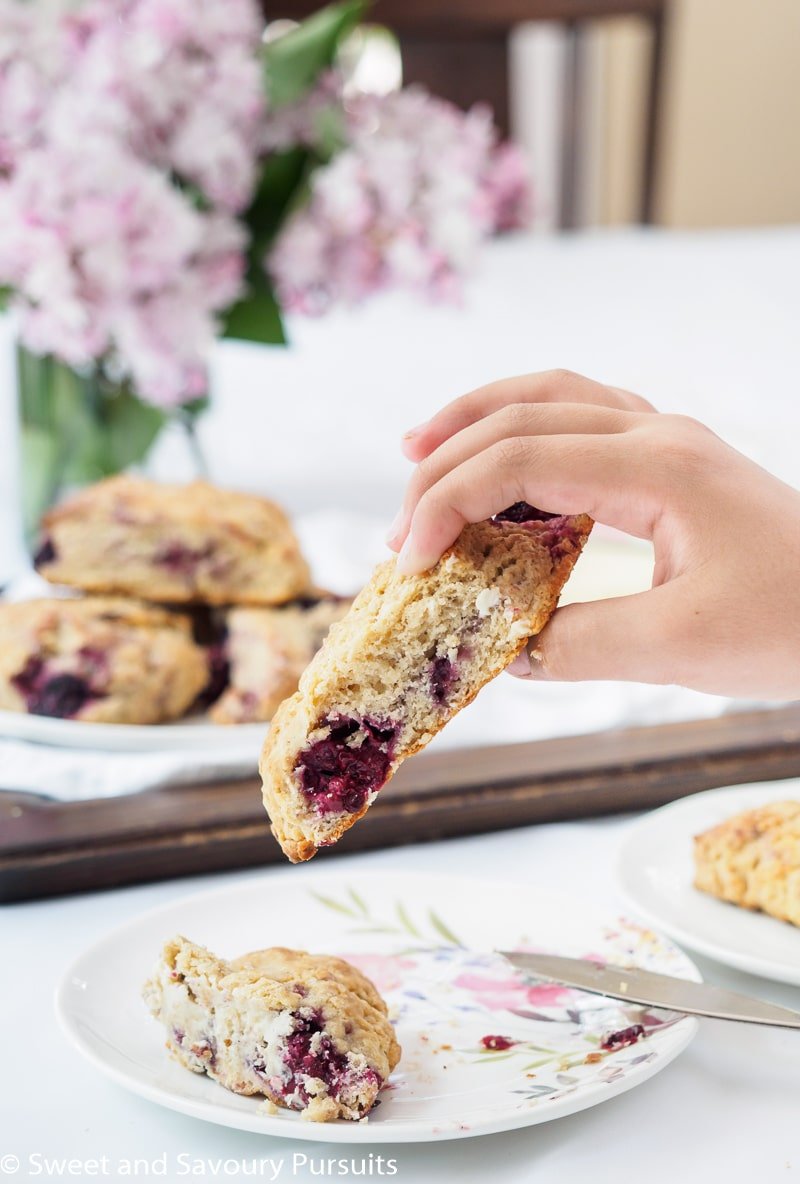
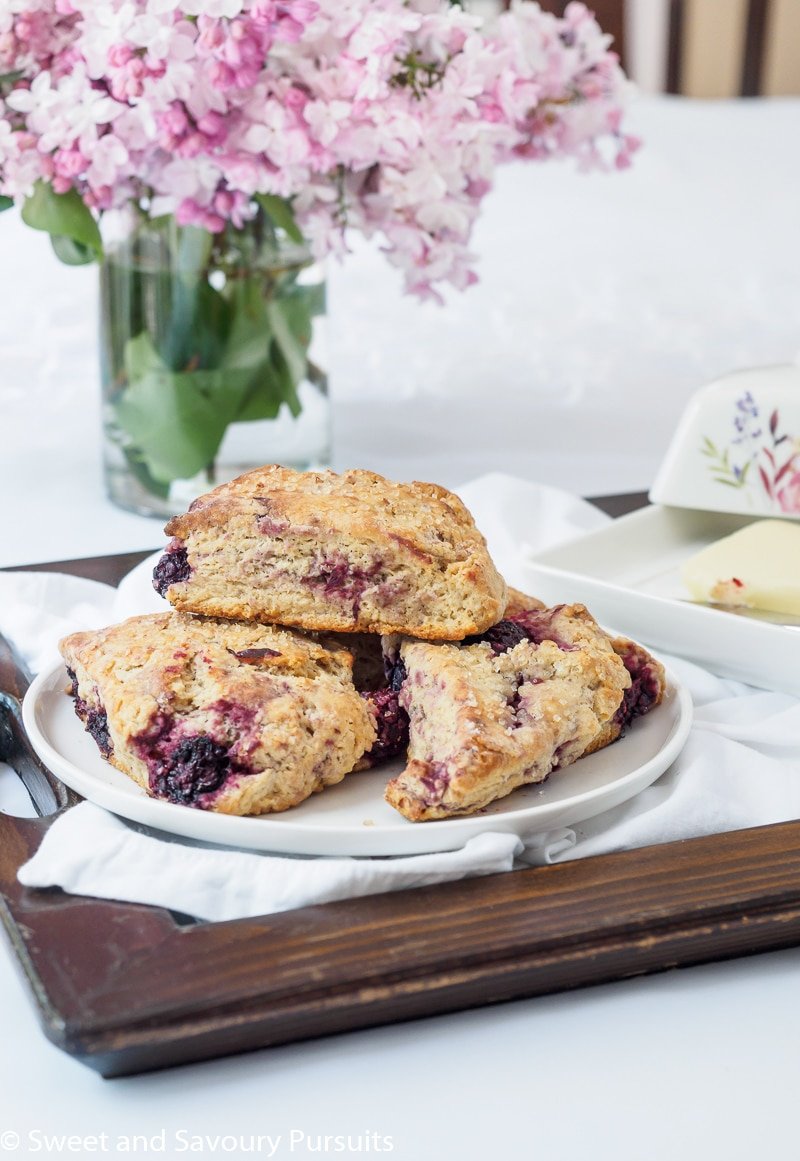
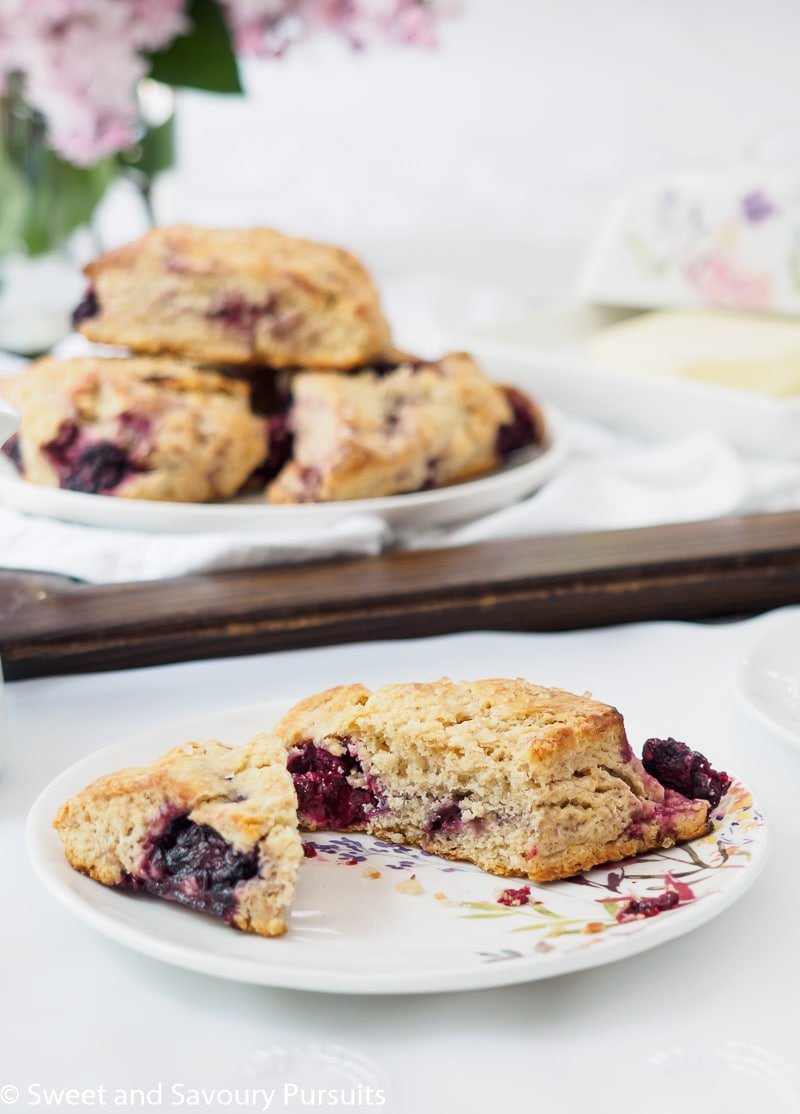
Perfect for brunch, an afternoon snack, or even a light sweet treat, these fresh Blackberry Scones are one of my favorite treats.
If you haven't tried baking scones yet, you'll be pleased to know that homemade scones are fresher, tastier than store-bought, and can be ready to enjoy in under 45 minutes!
If you're a fan of baked goods that combine sweet and tangy flavors, you will really enjoy this Blackberry Scone recipe.
Jump to:
How to Make Them
Once you've made scones a couple of times, you'll find them rather easy to make and will be delighted at all the flavour variations possible.
Here's an overview of the ingredients needed for this recipe. For ingredient amounts please see the recipe card at the end of this post.
Ingredients Overview:
- All-purpose flour and whole wheat pastry flour - If you prefer you can just use all-purpose flour
- Granulated sugar
- Baking powder
- Cinnamon: Can be omitted if you don't like cinnamon.
- Salt
- Butter: The butter should be straight out of the refrigerator or even the freezer because cold butter ensures flaky scones. To simplify cutting the cold butter into the flour mixture, grate the butter using the large holes of a box grater.
- Sour cream and milk: Using a combination of sour cream and milk is a great substitute for buttermilk and produces tender scones. If you prefer to use buttermilk simply substitute total amount of sour cream and milk in the recipe with buttermilk.
- Egg
- Vanilla extract
- Frozen or fresh blackberries: Using frozen berries makes it easier to mix them into the dough without bruising and breaking the berries too much.
Tip: For tender fluffy scones avoid over-kneading the dough, scones only need light kneading for a perfect flaky texture. Since scones have a natural rustic look to them there is no need for perfect looking scones.
Steps Overview:
- Start by preheating the oven and lining a baking sheet with parchment paper.
- In a large bowl, combine the dry ingredients, whisk and set aside.
- Grate the cold butter and add it to the flour mixture. Work the butter into the flour until the mixture resembles coarse meal. You could use a pastry cutter, a fork or your fingers to do this.
- Into a small bowl, add the sour cream, milk, egg and vanilla extract. Whisk until combined.
- Add the liquid mixture into the flour mixture and mix the dough. If the scone dough seems to dry, add a tablespoon of sour cream, and if it's too sticky, add a tablespoon of flour. Gently fold in the blackberries.
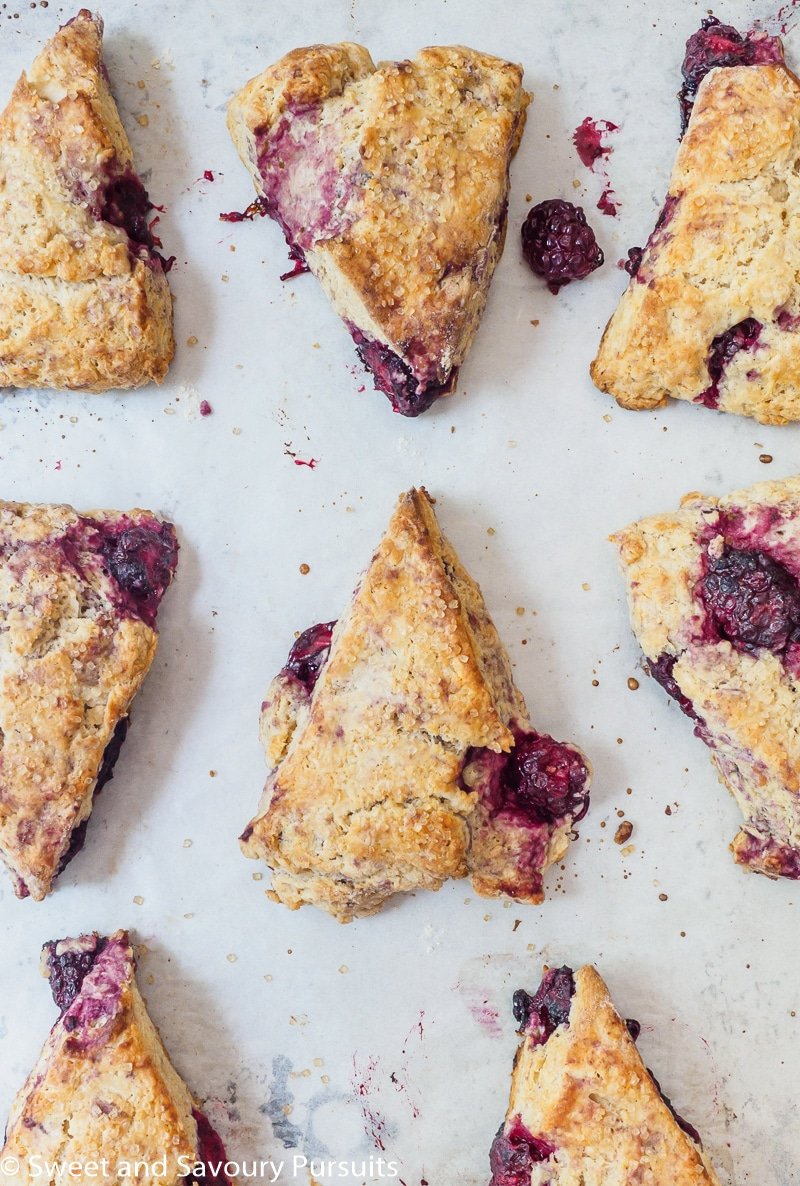
- Sprinkle a touch of all-purpose flour on your hands and countertop and transfer the dough to the floured surface. Knead the dough gently until it comes together and shape it into an 8 inch wide disk. Cut the disk into 8 equal parts.
- Place the scones 2 to 3 inches apart onto the prepared baking sheet. Brush the top of the scones with a bit of milk and sprinkle with coarse sugar (or regular granulated sugar if coarse isn't available).
- Bake in the oven until golden around the edges.
- Allow the scones to cool for 10 minutes before serving warm or at room temperature.
Serving Suggestions
You can serve these blackberry scones for brunch, afternoon tea or even a light dessert. Since this is an American style scone, it can be enjoyed as is since it's already rich in butter and sugar. Though if you're going to eat a fresh scone still warm from the oven a little dab of butter is heavenly 😉. Serve scones with a hot cup of tea or coffee for a wonderful treat.
Storage Instructions
Scones are best consumed fresh while they are still warm from the oven. Store any leftover scones at room temperature for up to 2 days or in the refrigerator for up to 4 days.
To freeze baked scones, place the cooled scones in a freezer bag or airtight container and store in the freezer for up to 3 months.
Thaw the frozen scones on the counter for a couple hours or overnight in the refrigerator. To warm scones, place them on a baking sheet and warm them in a preheated oven (300°F) for approximately 10 minutes.
If you love this Blackberry Scones recipe, feel free to experiment by trying out your favorite flavor combinations to make your own fruit scones. The possibilities are endless.
Enjoy!
More Delicious Teatime Treats
- Irish Scones
- Pumpkin Scones with Espresso Glaze
- Tahini and Pistachio Cinnamon Rolls
- Blueberry Almond Crumble Galette
Blackberry Scones
Ingredients
- 1 ½ cups all-purpose flour more for counter and hands
- ½ cup whole wheat pastry flour or all-purpose flour
- ⅓ cup granulated sugar
- 1 tablespoon baking powder
- ½ teaspoon ground cinnamon
- ¼ teaspoon salt
- ½ cup cold butter grated
- ⅓ cup sour cream full-fat
- ¼ cup milk
- 1 large egg
- 1 teaspoon vanilla extract
- 1 cup fresh or frozen blackberries
Instructions
- Place a rack in the centre of your oven and preheat oven to 400ºF. Line a baking sheet with parchment paper.
- In a medium bowl combine the flours, sugar, baking powder, ground cinnamon and salt. Whisk and set aside.
- Using a box grater, grate the cold butter and add it to the flour mixture. Using your fingers, a fork or a pastry cutter, work the butter into the flour until the mixture resembles coarse meal (you should have pea sized pieces of flour coated butter in the flour mixture). If its warm in your kitchen you could place the bowl in the refrigerator while you mix the wet ingredients.
- Into a small bowl, add the sour cream, milk, egg and vanilla extract. Whisk until combined.
- Add the liquid mixture into the flour mixture and using a fork start to mix the dough. If the dough seems to dry, add a tablespoon of sour cream, and if it's too sticky, add a tablespoon of flour. Gently fold in the blackberries (to avoid smashing them too much).
- Sprinkle a touch of all-purpose flour on your hands and counter and transfer the dough to the counter. Knead the dough gently until it comes together and shape it into an 8 inch wide disk. Using a large knife, cut the disk into 8 equal parts.
- Place the scones 2 to 3 inches apart onto the baking sheet. Brush the top of the scones with a bit of milk and sprinkle with coarse sugar (or regular granulated sugar if coarse isn't available). Bake in the oven until golden around the edges. I recommend checking on the scones at the 16 minute mark, if the scones are still not golden check again in a couple of minutes.
- Allow the scones to cool for 10 minutes before serving warm or at room temperature.
Notes
- For flaky scones, remember to use cold ingredients. The butter should be cold or even frozen. Grate the butter using the large holes of a box grater.
- Use frozen berries to make it easier to mix them into the dough without breaking them.
- Do not over-knead the dough, scones only need light kneading for the best flaky texture.
- Store leftover scones at room temperature for up to 2 days or store in the refrigerator for up to 4 days.
- To freeze baked scones, place cooled scones in a freezer bag or container.
- Thaw frozen scones on the counter for a couple hours or overnight in the refrigerator. Warm scones in the oven at 300°F for approximately 10 minutes.
Nutrition
This post wast originally published in June 2019. It has been updated. The recipe remains unchanged.

Kathy says
I made 3 batches, one with fresh berries and two with frozen. The fresh berries seem to make the batter too wet but the frozen turned out fine.
Fida | Sweet and Savoury Pursuits says
That's good to know, which berry did you use in the ones with the wet batter? I've made these with fresh blackberries and blueberries and didn't have any issues, but if you used strawberries, which are more juicy then I could see how the batter would be more wet.
Cyna says
I love how juice the blackberries look while the scones seem so delicate! The photos remind of a romantic B&B in the countryside. So very gorgeous, Fida!
Sweet and Savoury Pursuits says
Thank you so much Cyna. The blackberries I used were frozen so they were easier to mix into the dough. I think that's why they stayed intact and remained plump and juicy. Hope you have a wonderful day!